Guides for macOS
Sections on this page

X-Lite
Download X-Lite for macOS
Follow the guide below to get up and running with the X-Lite application:
- Download, install and launch X-Lite.
- Click X-Lite in the task bar and then select Preferences.
- Click on the 'Accounts' tab and then click the '+' icon to add a new account (if the new account window doesn't automatically appear).
- In the 'Account name' field, enter a description for your VoIP User. Make sure that 'Use for: Call' and 'Use for: IM/Presence' are both checked.
- In the User ID field, enter the username you set up on the VoIP User (this is case sensitive).
- In the Domain field, enter the domain supplied with your VoIP user.
- In the Password field, enter the password you set up on the VoIP User (this is case sensitive).
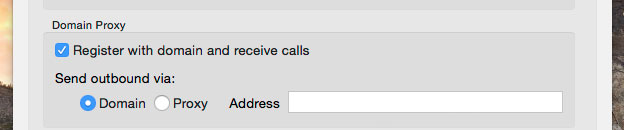
- Make sure 'Register with domain and receive calls' is checked.
- In the Send outbound via: section, make sure the 'Domain' option is selected.
- Click OK to save your settings.


Zoiper
Download Zoiper for macOS
Follow the guide below to get up and running with the Zoiper application:
- Download, install and launch Zoiper.
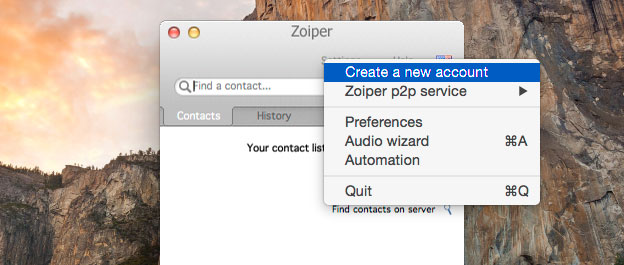
- Click on Settings and the 'Create a new account'.
- Select 'SIP' as the account type and click the next button.
- In the user / user@host field, enter the username you set up on the VoIP User (this is case sensitive), followed by the domain supplied with your VoIP User. e.g. TTNCUser@1a6036cd.sip.ttnc.co.uk
- In the Password field, enter the password you set up on the VoIP User (this is case sensitive).
- In the Domain / Outbound proxy field, enter the domain supplied with your VoIP user and then click the next button.
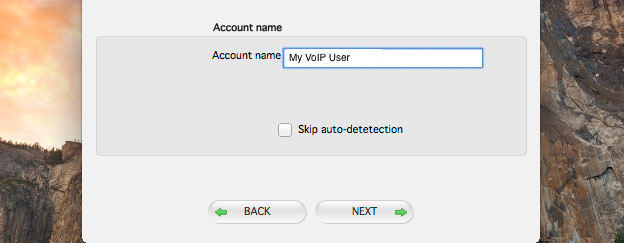
- In the 'Account name' field, enter a description for your VoIP User and click the next button.
- Once your account has been created, click the Close button to start using Zoiper.


Bria
Download Bria for macOS
Follow the guide below to get up and running with the Bria application:
- Purchase, download, install and launch Bria.
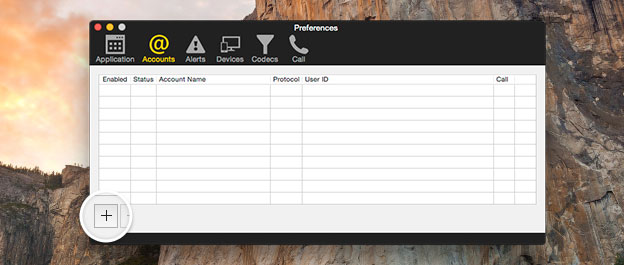
- Click Bria in the task bar and then select Preferences.
- Click on the 'Accounts' tab and then click the '+' icon to add a new account (if the new account window doesn't automatically appear).
- In the 'Account name' field, enter a description for your VoIP User. Make sure that 'Use for: Call' and 'Use for: IM/Presence' are both checked.
- In the User ID field, enter the username you set up on the VoIP User (this is case sensitive).
- In the Domain field, enter the domain supplied with your VoIP User.
- In the Password field, enter the password you set up on the VoIP User (this is case sensitive).
- Make sure 'Register with domain and receive calls' is checked.
- In the Send outbound via: section, make sure the 'Domain' option is selected.
- Click OK to save your settings.